KubeLift getting started (Part 1): Launching KubeLift Solo via the Azure CLI
Posted in Tutorials on December 14, 2022 by Stuart Preston ‐ 3 min read
This is the first of a three-part series to help you get started using KubeLift on the Azure platform. We love contrived examples of deploying workload on Kubernetes around here, so let’s walk through a complete scenario with KubeLift, WordPress and MariaDB deployed by Helm and an example of observing ingress and pod networking traffic using Cilium’s Hubble tooling.
- Part 1: Launching KubeLift Solo via the Azure CLI ✨ *** YOU ARE HERE ***
- Part 2: Installing WordPress and Maria DB via Helm.sh 🌍
- Part 3: Observing ingress and pod-to-pod traffic using Cilium Hubble 🚀
By end of the series you’ll see how spinning up KubeLift is a quick and cost-effective way to learn Kubernetes on the Azure platform.
Prerequisites:
- Azure CLI
- Azure Subscription (as KubeLift is a paid-for offer on the Azure Marketplace, a credit-card needs to be added to the subscription as a payment method)
- Kubectl
- Helm
- A code editor (e.g. Vim or Visual Studio Code)
Creating a KubeLift Solo instance
Assuming you are already logged into the Azure CLI (via az login), we’ll create a Resource Group for the resources and then create the KubeLift instance:
az group create -n kubelift --location westeurope

az vm create --resource-group kubelift --name vm0 --image polverio:kubelift:solo:latest \
--size Standard_B4ms --public-ip-sku Standard
After a minute or so you’ll be shown the private and public IP addresses used for the VM. Save these for later.
{
  "fqdns": "",
  "id": "/subscriptions/a11721d0-ABAB-CDCD-DEDE-ce4cadfb78c8/resourceGroups/kubelift/providers/Microsoft.Compute/virtualMachines/vm0",
  "location": "westeurope",
  "macAddress": "00-0D-3A-4C-81-25",
  "powerState": "VM running",
  "privateIpAddress": "10.0.0.4",
  "publicIpAddress": "108.143.148.120",
  "resourceGroup": "kubelift",
  "zones": ""
}
By default, the Azure CLI does not open the port to the Kubernetes API server, so let’s add it:
az vm open-port --resource-group kubelift --name vm0 --port 6443
By now the KubeLift instance should be fully configured on the appliance, so we need to retrieve the Kubernetes config file onto our client. This can be achieved by using the following command, remembering to substitute the correct IP address:
ssh -tt 108.143.148.120 "sudo cat /etc/kubernetes/admin.conf" > ~/.kube/config
Since we are connecting to our appliance over the internet, we’ll need to update the IP address of the server entry in our
~/.kube/config file.- Open the
~/.kube/configfile in an editor of your choice - Find the following line:
server: https://10.0.0.4:6443
- Replace with the IP address of your server (example):
server: https://108.143.148.120:6443
- Save and close the file.
Testing the connection
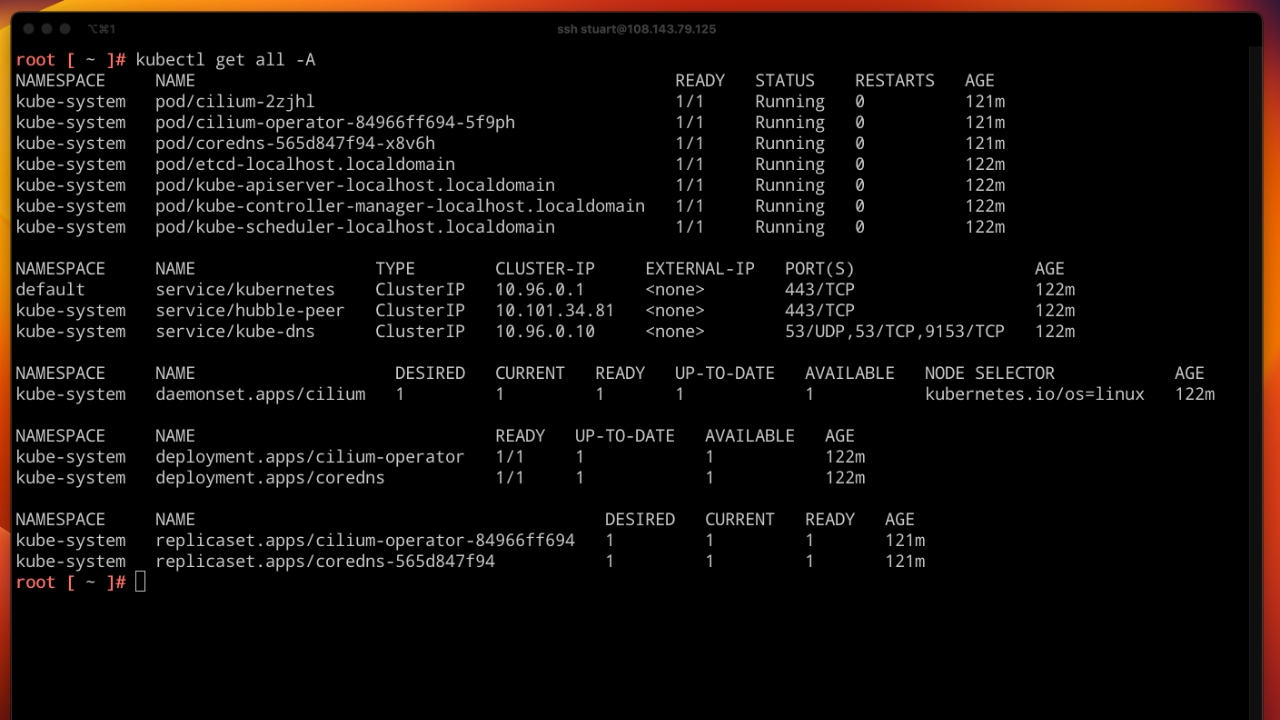
You should now be able to run standard kubectl commands, such as kubectl get pods -A
$ kubectl get pods -A
NAMESPACE     NAME                              READY   STATUS    RESTARTS   AGE
kube-system   cilium-operator-b58db7894-4qf8q   1/1     Running   0          18m
kube-system   cilium-qn6n5                      1/1     Running   0          18m
kube-system   coredns-787d4945fb-qwpkv          1/1     Running   0          18m
kube-system   etcd-vm0                          1/1     Running   0          18m
kube-system   kube-apiserver-vm0                1/1     Running   0          18m
kube-system   kube-controller-manager-vm0       1/1     Running   0          18m
kube-system   kube-scheduler-vm0                1/1     Running   0          18m
Summary
You can see that KubeLift has a very small footprint, running in just 7 pods and with no “kubeproxy” - this function is now fully embedded into Cilium CNI. Feel free to experiment with the kubectl CLI and discover more about the appliance.
Next Steps
In the next tutorial we will build on our environment and install an example workload, WordPress and MariaDB:

